new project window
new project window
Projects regarding VIDE are in the simplest of terms directories which serve as a binding element for a bunch of files.
Projects are not really sophisticated entities.
As of now a project consists of:
a directory
a (xml) properties file, which mainly includes information about what file of all files in the directory is the "main" file (or main files in case of multiple banks)
if you build a project, the main file is always used as the starting point
Projects are represented by a XML-File with the name of the project in the directory of the project.
If you want to load a project - you have to load the corresponding XML file.
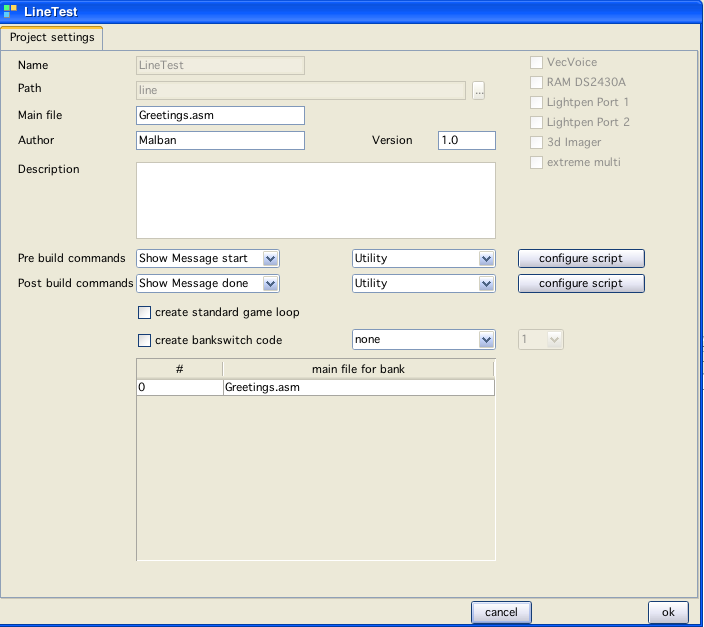
Projects can be created using the  button in the main vedi window. After selecting new project, the above window is displayed and you can enter your project configuration. The name and the directory in which the project resides can not be altered later!
In the directory given, a new directory with the name of the project will be created! After the creation process has finished the project files are displayed in a tree view on the right side of the window.
upon creation of a project you can select if your project should support bankswitching, if so you can chose between "standard" (two banks) or "VecFlash" (up to 64 banks)
you can chose to create code for each bank
each "main" - bank file is treated as such, upon project build the general idea is to create each bank seperatly and than join them to create a file vecxi will recognize as "bankswitchable"
each main file can support a "define" variable, that way you can "reuse" one main file and use assembler pseudo opcode "if" to define different sections for each bank in only one file
Tree
project popup
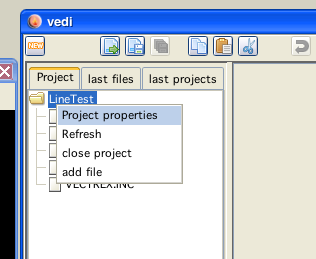
Right click on the tree elements pops up a PopupWindow :-)!
Root
If you right click on the root of the tree you can chose to:
edit the properties
close the project
add files to the project
(and refresh the tree)
add files
Opens a file choser window which lets you select (multiple) files. All selected files are added to the project. Added here means literally: copied to the project directory - nothing more and nothing less!
edit properties
Reopens the (very above) displayed window. Here you can change settings. Noteworthy are the two buttons:
configure script
Here you can select (and create) Java files that you wish to execute befor and/or after a project build process. These are java programs which are interpreted. You can virtually do anything here as long as java can. In the simplest case you can call other programs thru a java "execute/invoke". This way you can for example access batch files after building to "transport" you new binaries to other places (like a real vectrex).
Leaves
If you right click on a leave following popup will be displayed:
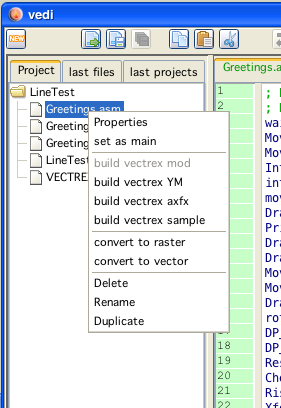
File popup
Properties
(not done yet)
Each file in a project can have seperate properties, while often these won't be neccessary, this can be used to configure mechanisms to build vectrex includable files from other formats (like mod, raster pictures, samples etc...) Here again you will be able to configure pre build actions which will consist of (again) java programs.
set main → a shortcut thats all
delete - deletes a file (or a directory) NO QUESTIONS ASKED! Be carefull!
rename - a file (or in java ways - click three times on a leave...)
duplicate - a file (gets a "copy" appended)
all the othr build/convert options are not yet done
(but planned :-
Java
Will be realized as "beanshell" scripts (basically java 1.2 which can be run as a script, you can do everything java 1.2 can do, that means access file system, do input/output etc, execute system commands etc) (don't worry, I will provide examples)